Setup a Dedicated CS:GO Server on AWS EC2
• • ☕️ 4 min readCS:GO is fun. And it is even more fun if you play with your friends and have complete control over the game and game mods.
This article is about setting up your own CS:GO Dedicated server on AWS EC2 instance for free.
Step 1: Setup AWS EC2 instance
First you need to create an account on AWS. After creating the account, head over to your AWS Management Console and create a new EC2 instance.
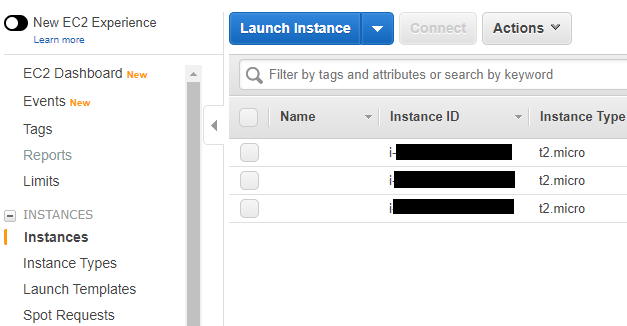
Navigate to the EC2 instances from sidebar. Then click on the Launch Instance button.
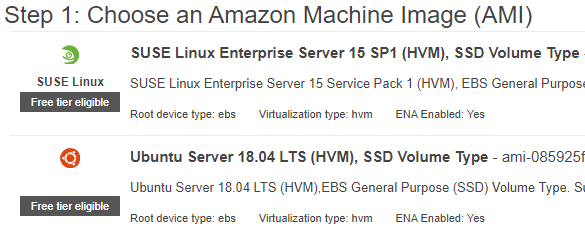
Now you need to select the Amazon Machine Image. Choose any free tier eligible machine you like. Just make sure it can run the CS:GO Dedicated server. I went with Ubuntu Server 18.04.
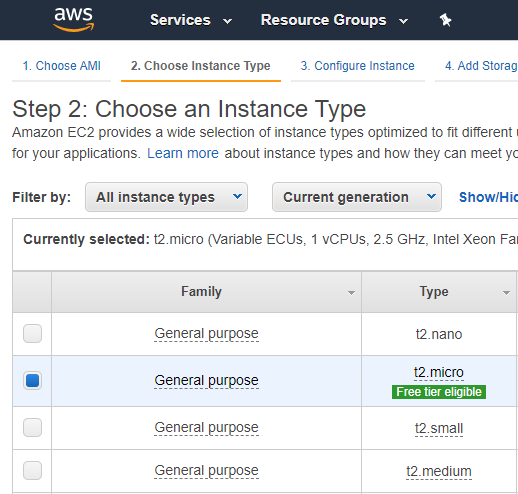
Now click on Next to choose the instance type. Select t2.micro because it is eligible with free tier.
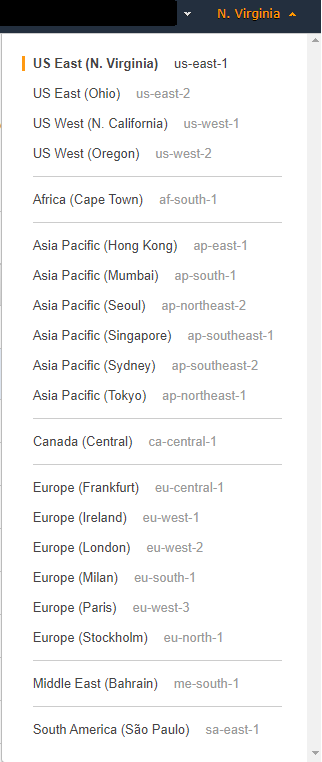
Now depending on your location, select the closest region to you. It is important to select the closest region to get the lowest possible ping while gaming on the server.
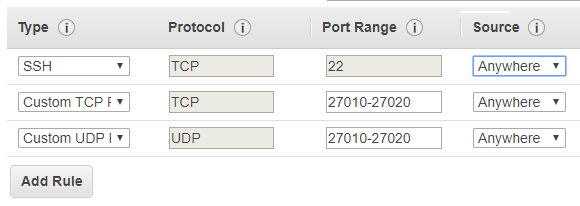
Now go to the Configure Security Settings tab, and add the following rules. CS:GO uses TCP/UDP Port Range 27010–27020 which need to be open. Also you need Port 22 to SSH into your server once it is created so that one need to be open too. Also make sure you set the source to your own IP Address or Anywhere.
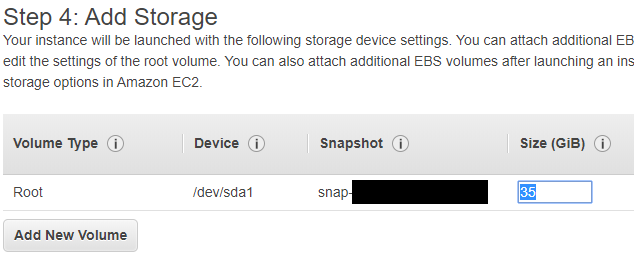
Now navigate to Add Storage tab and just change the size to 35GB because the CS:GO server takes around 25GB-30GB.
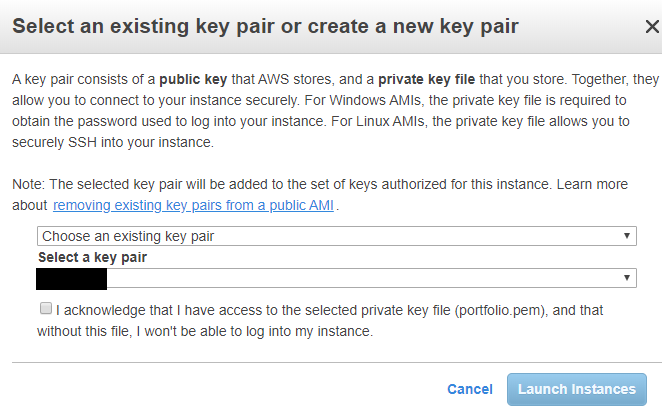
Now create a new key pair that you will need to SSH into the instance. Download it and keep it somewhere safe to be used later.
After that click Launch Instance and wait for the instance to boot completely.
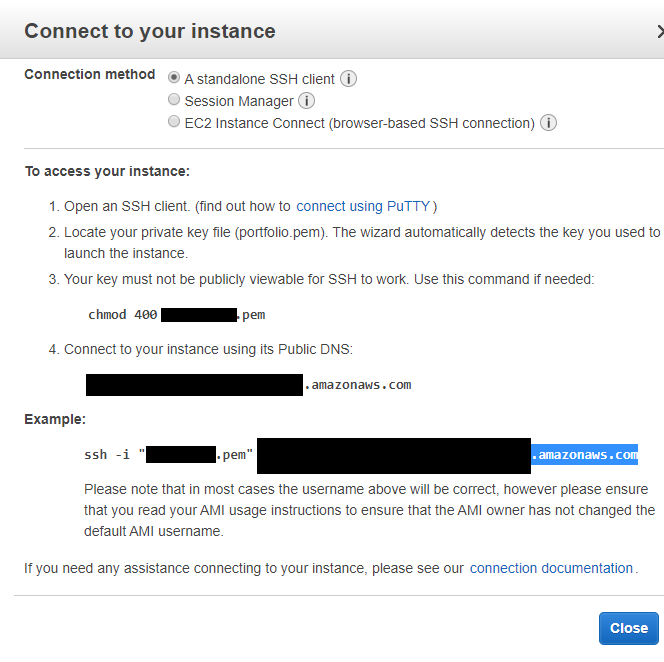
Once it has booted, click on the instance from the list of all instances and and press the Connect button at top. Copy your Public DNS.
Step 2: Install PuTTY
For the next step, you will need an SSH client if you are on Windows. Download PuTTY from this link and install it on your system.
Now before logging into your instance, you need to convert the .pem file that you downloaded while creating the instance to a .ppk file because PuTTY uses .ppk file for the key. To do this, Search for PuTTYgen on your system. It is a utility that comes with PuTTY that is used to convert .pem to .ppk.
Step 3: SSH into the instance
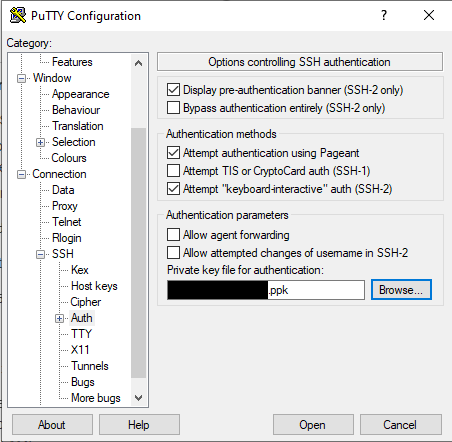
Once that is done, launch PuTTY and paste the Public DNS that you previously copied. Enter the Port 22 and then navigate to Connection/SSH/Auth from the sidebar. Click on Browse button and select the .ppk that was created by PuTTYgen. Now you are ready to SSH into your instance.
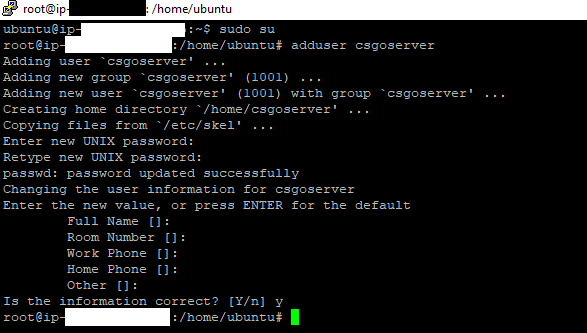
Now that you are in your instance, type sudo su to become root.
Step 4: Install the Dedicated CS:GO Server
Then type adduser csgoserver. This will create a new user that will be used to install the deciated server.
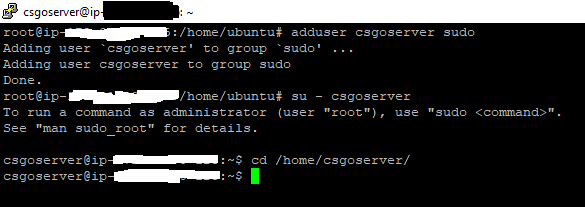
You alse need to give sudo privilege to this newly created user. This can be achieved by this adduser csgoserver sudo command.
Now change user to csgoserver by typing su - csgoserver. Navigate to /home/csgoserver by typing cd /home/csgoserver/.
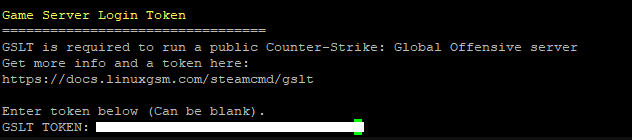
Now you need to create a Gameserver Login Token (GSLT). Head over to Steam Game Server Account Management and create a token. Your account must not be limited, banned or locked.
The App ID for CS:GO is 730.

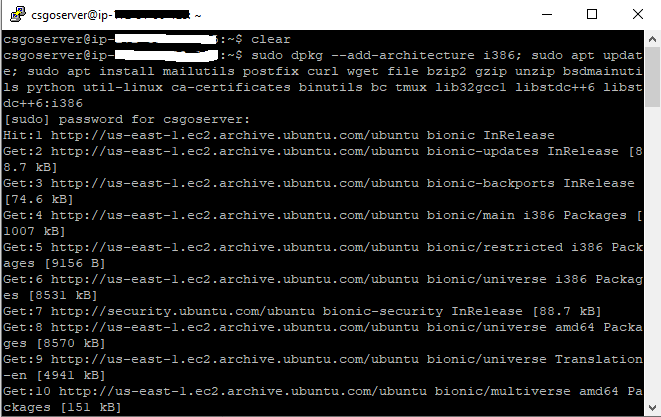
Now go back to your instance and type:
sudo dpkg --add-architecture i386; sudo apt update; sudo apt install mailutils postfix curl wget file bzip2 gzip unzip bsdmainutils python util-linux ca-certificates binutils bc tmux lib32gcc1 libstdc++6 libstdc++6:i386
This will install all the required dependencies.
Now type:
wget https://linuxgsm.com/dl/linuxgsm.sh && chmod +x linuxgsm.sh && bash linuxgsm.sh csgoserver
This will download and run the script.

Now type ./csgoserver install to run the installation script.

It will prompt you to enter the GSLT Token that you created earlier.
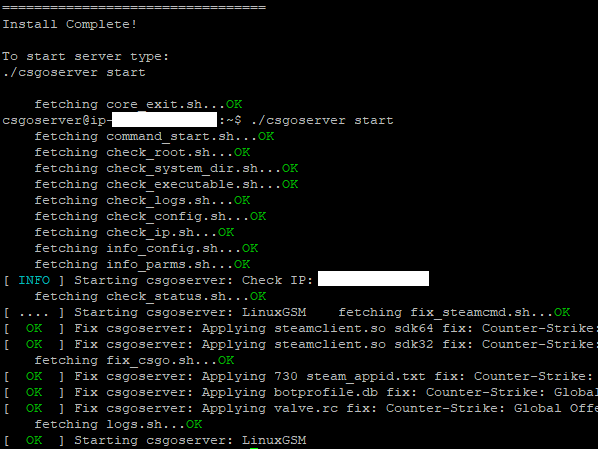
Once the installation is complete, just type ./csgoserver start to start the server.
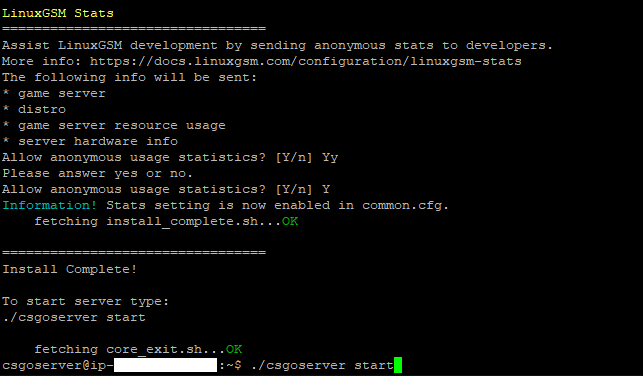
If everything goes well, you should see a something like this.
Step 5: Run the game and connect to server
Head over to your game now. Open the in-game console and type connect [IP:Port] to connect to your own CS:GO Dedicated server.

HAVE FUN!!!!